How to Install a Thermostat
A thermostat is a crucial component of any home’s heating, ventilation, and air conditioning (HVAC) system. It maintains the desired temperature, improves energy efficiency, and ultimately enhances the overall comfort of your living space.
While installing a thermostat may seem daunting, it’s a manageable DIY project with the right guidance. In this comprehensive guide, we’ll dive deep into the process of thermostat installation, covering tips, tricks, and troubleshooting for a seamless experience.
10 Easy DIY Steps to Install your Thermostat
Choose the Ideal Thermostat
The first step is selecting the perfect thermostat for your home. There are several types available, including:
- Non-programmable (manual) thermostats: Basic and budget-friendly, these thermostats require manual temperature adjustments. Honeywell is the most common and best brand for this type of thermostat
- Programmable thermostats: These thermostats allow you to preset temperature schedules, increasing energy efficiency and comfort. We also recommend a Honeywell thermostat like the T6 or 8000.
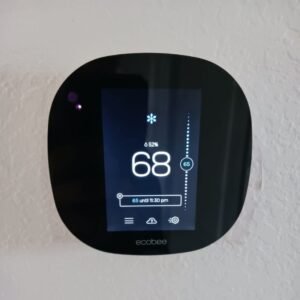
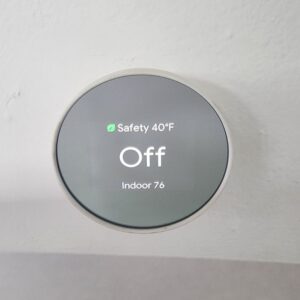
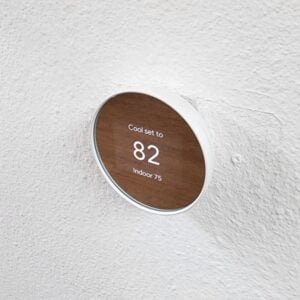
- Smart thermostats: Advanced and convenient, smart thermostats offer Wi-Fi connectivity, smartphone control, and learning capabilities for personalized temperature preferences. We recommend the Nest or the Ecobee thermostat.

Do I need a common cable?
If you decide to install a smart thermostat you need to establish if your current system has a common cable (usually a blue cable). Since smart thermostats do not use batteries they need direct power from the air handler and they get this from the common cable.
If your new thermostat requires a C-wire and your current setup doesn’t have one, you have several options:
- Install a C-wire: An HVAC professional can run a new C-wire from your HVAC system to your thermostat. This option ensures full compatibility and functionality.
- Use a C-wire adapter: Some manufacturers offer C-wire adapters or power extenders that can provide continuous power without installing a new wire. Check if your thermostat’s manufacturer has a compatible adapter.
- Choose a different thermostat: Opt for a thermostat that doesn’t require a C-wire, such as a non-programmable or a programmable model with battery backup.
What configuration is my HVAC system?
Before choosing a thermostat, determine your HVAC system’s configuration:
- 1 heat/1 cool: This configuration is commonly found in homes with a single heating source, such as a furnace or a straight cool.
- 2 heat/1 cool: This configuration is typically found in homes with two heating stages, such as a heat pump.
Check your HVAC equipment or consult a professional to identify your system’s configuration.
Consider your budget, preferences, and HVAC system compatibility when choosing a thermostat. Ensure that the thermostat you select is compatible with your home’s wiring, voltage, and HVAC equipment.
Gather Tools and Materials
To install a thermostat, gather the following tools and materials:
- Screwdriver (flathead and Phillips)
- Wire stripper
- Level
- Drill and drill bits (if required)
- Anchors and screws (included with the thermostat or purchased separately)
- Labels or masking tape (for labeling wires)
- A smartphone or camera (for documenting the wiring setup)
Turn Off the HVAC System
Before working with any electrical components, ensure your safety by turning off the power to the HVAC system at the main circuit breaker. Double-check by adjusting the thermostat’s temperature settings and confirming that the system doesn’t turn on.
Remove the Old Thermostat
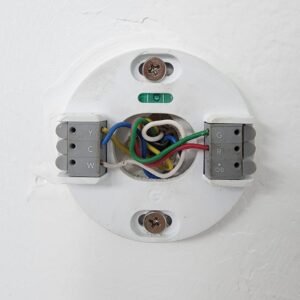
Carefully remove the cover of the old thermostat to expose the wires and mounting plate. Using your smartphone or camera, take a photo of the wiring setup for reference. Label each wire with masking tape or labels, noting its connection point. Gently disconnect the wires from the old thermostat, ensuring they don’t fall back into the wall. Unscrew the mounting plate and remove it from the wall.
Prepare the Wall
Fill in any unwanted holes with spackle or wall filler and allow it to dry. If necessary, touch up the paint to match the surrounding wall. This step ensures a clean and professional-looking installation.
Install the New Thermostat Base
Hold the new thermostat’s base against the wall, using a level to ensure it’s properly aligned. Mark the screw hole locations with a pencil. If the existing holes don’t align with the new thermostat’s base, drill new holes, insert wall anchors, and remove any dust or debris. Attach the base to the wall using the screws provided, ensuring it’s secure and level.
Connect the Wires
Referring to the photo or notes you took earlier, connect the labeled wires to the corresponding terminals on the new thermostat. If necessary, use a wire stripper to expose approximately 1/4 inch of the wire. Tighten the terminal screws to secure the wires in place. Consult the installation manual for specific wiring instructions, as different thermostats may have varying requirements.
If your system has a C-wire (common wire), ensure it’s connected to the new thermostat. If your system doesn’t have a C-wire and your thermostat requires one, you may need to consult an HVAC professional for assistance.

Attach the Thermostat to the Base
Once all the wires are connected, carefully attach the thermostat to its base, ensuring it snaps into place. Double-check that all wires are tucked neatly behind the unit to avoid any interference with the thermostat’s functionality.
Turn the Power Back On
Switch the power back on at the circuit breaker and verify if the thermostat powers on. If it doesn’t, turn off the power, recheck the wiring connections, and make any necessary adjustments before attempting to power on again.
Set Up and Test the Thermostat
Follow the manufacturer’s instructions to set up your new thermostat. This may include configuring the date, time, temperature schedules, and any smart features. Set your desired temperature and test both the heating and cooling functions to ensure the thermostat is working correctly. Make adjustments to the settings as needed and familiarize yourself with the thermostat’s features and functions.
Thermostat Troubleshooting Tips
If you encounter any issues during installation or testing, consider the following troubleshooting tips:
- Ensure the power is turned off at the circuit breaker before handling any electrical components.
- Double-check your wiring connections against the photo or notes taken earlier. Incorrect connections may cause the thermostat to malfunction.
- If your thermostat requires a C-wire and your system doesn’t have one, consult an HVAC professional for assistance. A C-wire provides continuous power to smart or Wi-Fi-enabled thermostats.
- Verify that your thermostat is compatible with your HVAC system. Incompatibility may cause the thermostat to not function properly.
- If the thermostat still doesn’t work after checking connections and compatibility, consult the manufacturer’s customer support or an HVAC professional for further assistance.

How much does it cost to install a thermostat?
The cost of installing a thermostat can vary depending on several factors, including the type of thermostat, labor costs, and any additional materials or equipment required. Here’s a general breakdown of the costs involved in thermostat installation:
Thermostat Cost:
- Non-programmable (manual) thermostats: $40 – $70
- Programmable thermostats: $30 – $150
- Smart thermostats: $100 – $300 or more
Keep in mind that these prices are approximate and can vary based on the brand, model, and features of the thermostat.
Labor Costs:
If you choose to hire a professional for the installation, labor costs can range from $180 to $250, depending on the complexity of the job and the rates in your area. Some HVAC professionals may charge a flat rate, while others may charge by the hour.
Additional Costs:
There may be additional costs involved, such as:
- Installing a new common wire (C-wire), if required: $300 – $550
- Purchasing a C-wire adapter or power extender kit, if needed: $15 – $40
- Repairing or updating existing wiring: $100 – $500, depending on the extent of work needed
DIY Installation:
If you’re comfortable with basic electrical work and follow the proper safety precautions, you can save on labor costs by installing the thermostat yourself. This option is generally more feasible for non-programmable and programmable thermostats, while smart thermostats may require more advanced technical knowledge.
In summary, the total cost of installing a thermostat can range from around $50 for a basic DIY installation to $500 or more for a professionally installed smart thermostat with additional wiring work. It’s essential to consider your specific needs, preferences, and budget when determining the overall cost of thermostat installation.
How long does it take to install a thermostat?
The time it takes to install a thermostat can vary depending on several factors, such as your experience level, the type of thermostat, and the complexity of your HVAC system and wiring. Here’s a general estimate of the time required for thermostat installation:
- Non-programmable (manual) and programmable thermostats:
For individuals with basic electrical knowledge and experience, installing a non-programmable or programmable thermostat can take anywhere from 10 minutes to 30 minutes. If you are a beginner or less experienced, it may take longer as you follow the installation instructions step-by-step and familiarize yourself with the process.
- Smart thermostats:
Smart thermostats typically require more time for installation due to their advanced features and potential wiring complexities, such as the need for a common wire (C-wire). For those with experience, it may take approximately 20 to 40 minutes to install a smart thermostat. For beginners, the installation process could take longer, potentially up to 1 hour or more, as you navigate through the setup and configuration of the device.
Keep in mind that these time estimates can vary based on individual circumstances, and additional time may be required if you encounter wiring issues or need to consult an HVAC professional for assistance. To ensure a successful installation, always follow the thermostat manufacturer’s instructions and safety precautions.
How difficult is it to move a thermostat?
Moving a thermostat can be a moderately difficult task, depending on your experience with electrical work, the distance you want to move it, and the type of thermostat you have. Here are some factors to consider when moving a thermostat:
- Wiring Considerations: When relocating a thermostat, you will need to extend or reroute the existing wiring to the new location. This may involve running new wires through walls or ceilings, which can be challenging if you’re not familiar with this type of work. You’ll need to make sure that the new wire connections are done correctly and follow the thermostat’s wiring guidelines.
- Wall Preparation: At the new location, you’ll need to prepare the wall for the thermostat installation. This might involve drilling holes for mounting screws, installing wall anchors, and patching and painting the wall at the old location.
- HVAC System Configuration: Ensure that the new thermostat location is appropriate for your HVAC system configuration. The thermostat should be placed away from direct sunlight, drafts, or heat sources, and on an interior wall to accurately measure the ambient temperature.
- Experience Level: If you have experience with electrical work and basic DIY tasks, moving a thermostat could be a manageable project. However, if you’re not comfortable with these tasks or encounter issues such as complex wiring or obstacles in the walls, it’s best to consult an HVAC professional.
- Time Investment: Moving a thermostat can be time-consuming, especially if you need to extend or reroute wiring and patch walls. Be prepared to invest several hours or even a full day in the project, depending on your experience and the specific challenges involved.
In summary, moving a thermostat can range from moderately difficult to quite challenging, depending on your experience, the complexity of your HVAC system and wiring, and the distance you want to move it. If you’re unsure of your ability to tackle this project, consider hiring an HVAC professional to ensure a safe and successful relocation.

Where should you not put a thermostat?
To ensure accurate temperature readings and optimal performance, it’s important to place a thermostat in a suitable location. Here are some areas where you should avoid installing a thermostat:
- Direct sunlight: Exposure to direct sunlight can cause the thermostat to read a higher temperature than the actual room temperature, leading to overcooling or underheating.
- Near air vents: Placing a thermostat too close to air vents can cause it to read the temperature of the air coming from the vent rather than the ambient room temperature, resulting in an imbalanced heating or cooling.
- Near heat sources: Avoid installing the thermostat near heat-generating appliances, such as ovens, stoves, or radiators, as they can cause inaccurate temperature readings.
- Exterior walls: Exterior walls can be affected by outdoor temperatures, which can lead to inaccurate thermostat readings. It’s best to install the thermostat on an interior wall.
- Drafty areas: Placing a thermostat in drafty areas, such as near doors or windows, can cause it to register a lower temperature than the actual room temperature, leading to overuse of heating or cooling systems.
- In closed-off rooms: Installing a thermostat in a closed-off room, such as a rarely-used guest room, can result in inaccurate temperature readings for the rest of the house, as the thermostat may not accurately gauge the overall home temperature.
- Near windows or doors: Windows and doors can let in drafts, sunlight, and outdoor temperatures, which can affect the thermostat’s performance.
- High-traffic areas: Avoid placing the thermostat in high-traffic areas, as people passing by can inadvertently bump or adjust the settings.
- Behind furniture or curtains: Placing a thermostat behind furniture, curtains, or other obstructions can restrict airflow, leading to inaccurate temperature readings.
To ensure optimal thermostat performance and energy efficiency, choose a location on an interior wall, away from direct sunlight, drafts, and heat sources, and in a central area of the home that represents the average temperature of the living spaces.
What is the lifespan of a thermostat?
The lifespan of a thermostat varies based on its type, quality, and usage. Non-programmable thermostats can last 10-20 years, programmable thermostats typically last 10-15 years, and smart thermostats have a similar lifespan of around 10-13 years. Lifespan can be influenced by factors such as the specific model, usage patterns, and environmental conditions. Proper maintenance and following manufacturer guidelines can help extend the life of your thermostat. Consider upgrading to a more energy-efficient model before your current thermostat reaches the end of its lifespan.
Summing Up: Achieve Home Comfort and Efficiency with the Ideal Thermostat and The AC Therapist’s Support
Installing and maintaining a thermostat is a crucial aspect of ensuring a comfortable and energy-efficient home environment. From understanding the different types of thermostats to selecting the right one based on your HVAC system’s configuration, wiring requirements, and personal preferences, there are many factors to consider during the decision-making process. Moreover, placing the thermostat in an appropriate location, away from direct sunlight, drafts, and heat sources, is essential for accurate temperature readings and optimal performance.
As the technology advances, smart thermostats are becoming increasingly popular due to their energy-saving features, remote control capabilities, and integration with other smart home devices. While they may have a shorter lifespan compared to their traditional counterparts, the potential energy savings and convenience they offer can make them a valuable investment in the long run.
Whether you’re a DIY enthusiast or prefer to rely on professional assistance, having the right information and guidance can make thermostat installation and maintenance a smooth and hassle-free experience. If you encounter any challenges or need expert advice, The AC Therapist is here to help. With a team of experienced and knowledgeable HVAC professionals, The AC Therapist offers a wide range of services, including thermostat installation, troubleshooting, and HVAC system maintenance.
By choosing The AC Therapist for your thermostat needs, you can ensure that your home stays comfortable year-round while maximizing energy efficiency and prolonging the life of your HVAC system. Our team is committed to providing top-quality service and tailored solutions to meet your unique requirements. So, trust The AC Therapist to help you create the perfect home environment with a thermostat that best suits your needs. Visit our website or contact us today to learn more about our services and discover how we can support you in achieving the ideal indoor climate for your home.


